
Centre SOLAR Co-ordinator
The Centre SOLAR Co-ordinator is:
- The main point of contact for all SOLAR specific communications
- Responsible for maintaining access to SOLAR for staff within their centre who require it.
SOLAR Centre User Access
This guidance explains how to manage access to SOLAR for your centre. It is intended for the Centre SOLAR Co-ordinator, who is responsible for maintaining access to SOLAR for other staff members within your centre.
You must follow all instructions in this section exactly as described. Failure to do so may result in issues for users accessing SOLAR.
For additional information about access to SOLAR and the associated data, please refer to the SOLAR Centre Operating Guide.
As Centre SOLAR Co-ordinator you can assign Centre SOLAR User roles to staff members within your centre. However, you cannot assign Centre SOLAR Co-ordinator roles. If you need to change your Centre SOLAR Co-ordinator, contact our Digital Services Support Helpdesk.
Roles
In SOLAR, there are three centre roles available.
Centre SOLAR Co-ordinator – Setup Access
This role is for Centre SOLAR Co-ordinators and gives access to:
- Create and manage other SOLAR users in your centre
- Create and manage candidates in your centre
Centre SOLAR User – Setup Access
This role is for Centre SOLAR Users and gives access to:
- Create and manage candidates in your centre
Centre SOLAR User – Test Administration
This role is for both Centre SOLAR Co-ordinators and Centre SOLAR Users and gives access to:
- Schedule, invigilate, and mark assessments
- View results and schedule candidate reviews of assessments
Create a new user
This section explains how to add a new user in the same format we’ve used for other accordion banners.
-
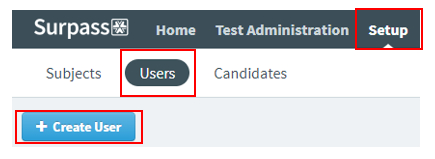
Go to Setup, then select Users, and finally select Create User.
-
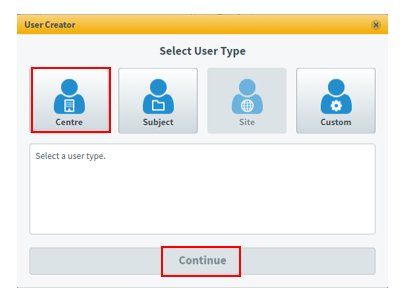
In the Select User Type dialogue box, choose Centre, then select Continue.
-
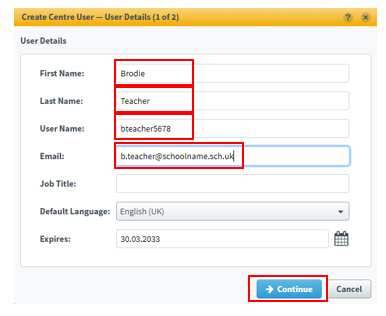
In the Create Centre User – User Details dialogue box, enter the user’s details. Only complete the following fields:
-
First Name: enter the user’s first name
-
Last Name: enter the user’s surname
-
User Name: use the format InitialSurnameCentreNumber, for example BTeacher2345678
-
Email: enter the user’s email address
-
-
Select Continue.
-
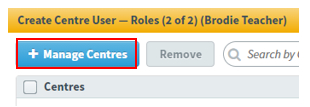
Select Manage Centres.
-
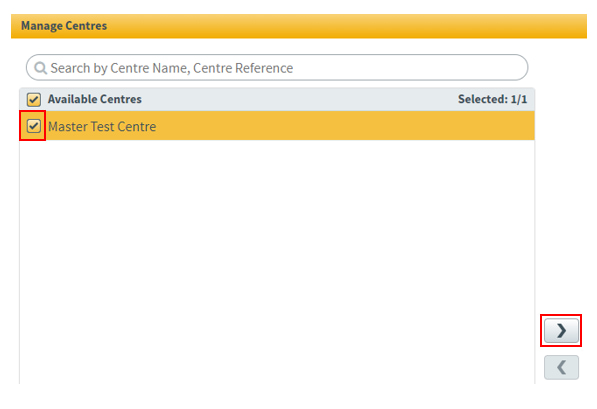
In the Manage Centres dialogue box, your centre should be listed under Available Centres. Tick the checkbox next to your centre, then select the right-facing arrow.
-
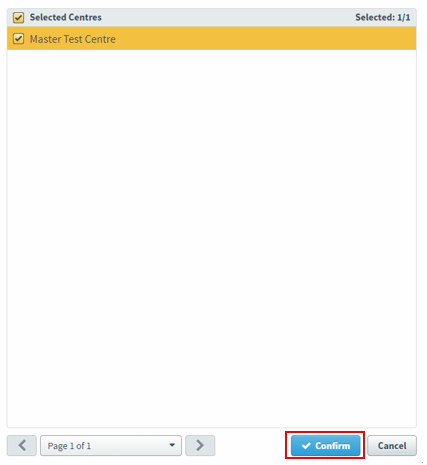
Your centre should now appear under Selected Centres. Select Confirm.
-
Under Centre Roles, select the checkboxes next to Centre SOLAR User – Setup and Centre SOLAR User – Test Administration.
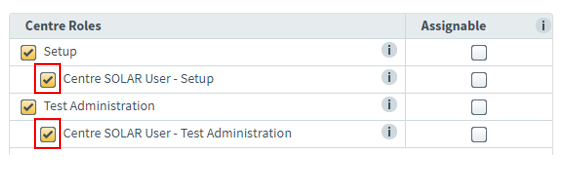 o Centre SOLAR User – Setupo Centre SOLAR User – Test Administration
 -
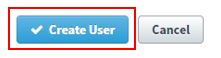
Select Create User.
-
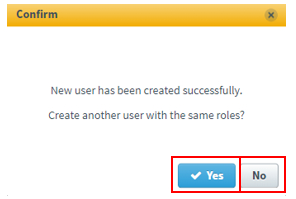
A confirmation message will appear to confirm that the new user has been created. You will then be asked whether you want to create another user with the same roles. Select Yes to create another user or No to finish.
-
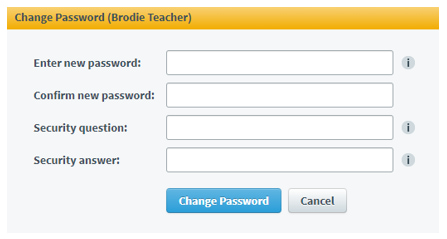
Each user you create will receive an email from noreply@surpass.com confirming their username and providing a link to set their password and security question. If the user has not received the email, ask them to check their junk or spam email folder. You should also check with your centre's technical staff or email provider to ensure that emails from noreply@surpass.com are permitted.
-
The user or users you created will now appear in the list of users for your centre.

Show all users or find a user
This section explains how to display and add new users.
-
Go to Setup, then select Users.
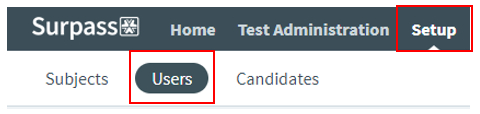
All users for your centre are listed on the screen. -
If there is more than one page of users, navigational arrows and a page number drop-down are available at the bottom of the screen.

-
Use the search box to find a specific user, or use the drop-down menu to change the order in which users are displayed.

-
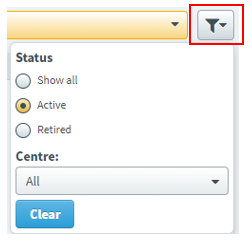
Use the filter drop-down menu to display All, Active, or Retired users for your centre.
Edit or retire a user
This section explains how to edit and retire users.
-
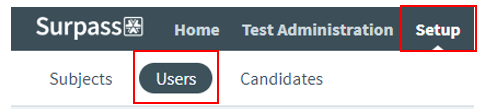
Go to Setup, then select Users.
-
Find the user you want to edit in the list. Once selected, the user will be highlighted in orange.

-
Use the search box to find a user, or use the drop-down menu to change the order in which users are displayed.

-
If there is more than one page of users, navigational arrows and a page number drop-down are available at the bottom of the screen.
-
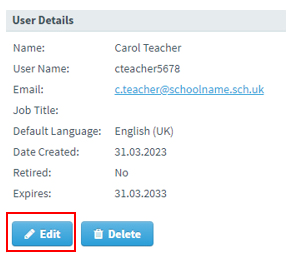
Select Edit in the User Details box.
-
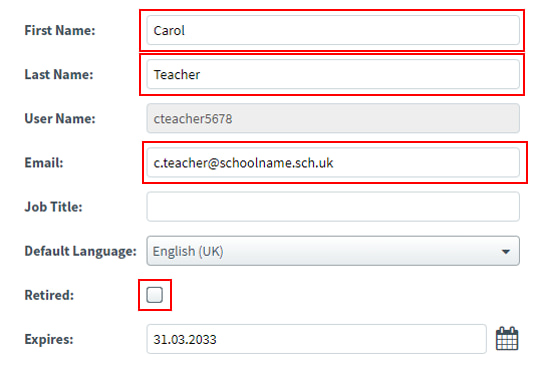
You can edit the user’s First Name, Last Name, and Email address. The User Name can't be changed. To retire a user, select the checkbox next to Retired.
-
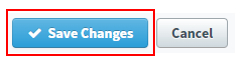
Select Save Changes.
-
Retired users will no longer appear in the active user list and will not be able to access SOLAR.
-
You cannot modify your own user details. If you need to update your information, contact our Digital Services Support Helpdesk.